Trinity Stamps

Valentine Spinner Rocker Card

CBKJan27-2

Today I wanted to make an interactive Valentine’s Day card.  I do love shaped cards and don’t feel that I make enough of them.

To make the card:

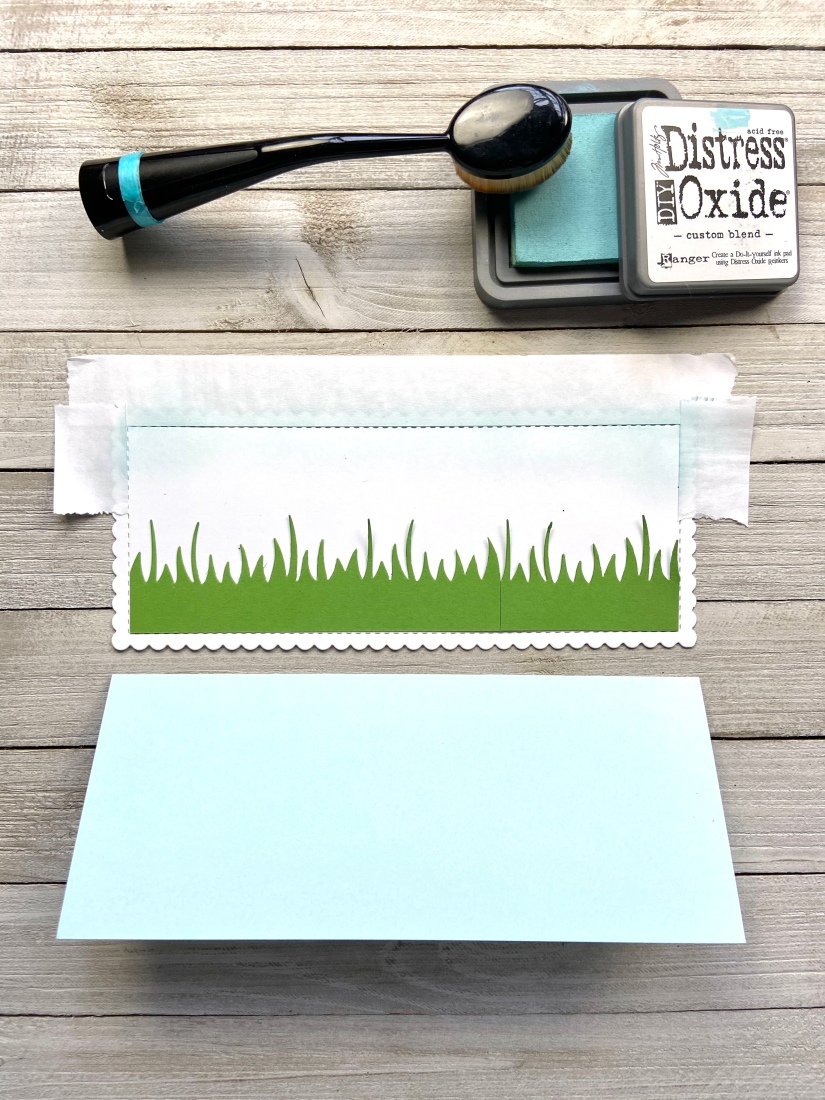
I first prepared a few elements before putting the card together. I die cut a 5 inch diameter circle from 110 lb Neenah solar white cardstock, which I scored in one direction in the middle to form my card base, and a 4.5 inch diameter circle from Lawn Fawn speckled paper.

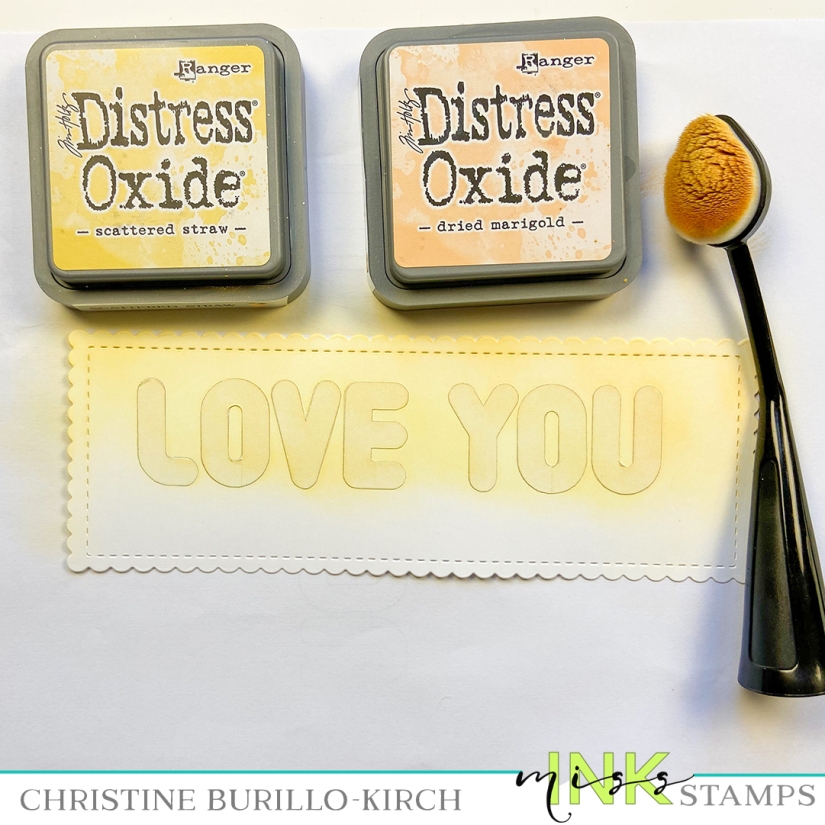
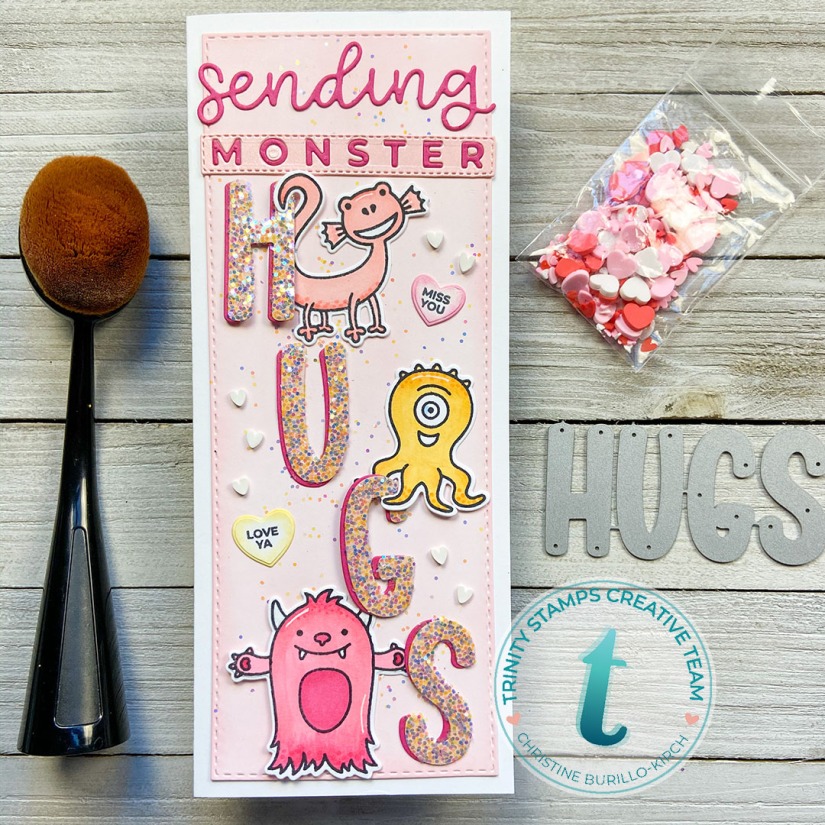
I stamped the cute monster from the Monster Love stamp set onto Neenah 110 lb solar white cardstock, die cut him with the Monster Love die set, copic colored with and put a few white gel pen highlights on him. I then took a 4 inch die cut circle of 110 Neenah solar white cardstock and ink blended Distress oxide inks milled lavender, seedless preserves & dusty concord with a blender buddy over the Heartburst Layering StencilI die cut hearts from the Slimline Card Series: Frame and Fold Die Set out of lavender cardstock and a large heart out of gold cardstock.  I stamped sentiments from the Monster Love stamp set into the smaller hearts.  I adhered all the hearts onto the stenciled cardstock.

To put together the card, I punched a hole (in the middle) of the Lawn Fawn Speckled circle, 2 smaller circles of cardstock and into the middle of the stencil cardstock.  I adhered the Lawn Fawn Speckled circle on to the card base (only the lower half of the cardstock is adhered). To make the middle circle into a spinner, I put a brad through a smaller circle, then the stenciled cardstock, then the other smaller circle and then the Lawn Fawn speckled circle. Double sided foam adhered the monster to the outer smaller circle and the inner smaller circle to the Speckled paper. This gave free range motion to the inner stenciled circle with the sentiments.

Thank you for stopping by!

CBKJan27

Miss Ink Stamps

Thinking of You Galaxy Card

CBKJan26-2

I wanted to make a galaxy card, paired with some Dazzle Dust, with some new watercolors that I had recently bought.  After looking at several of the Dazzle Dusts, I felt that Mermaid Lagoon Dazzle Dust paired really well.

To make the card:

I added s sheet of strong double sided adhesive to a panel of cardstock, poured Mermaid Lagoon Dazzle Dust on it and the shook the excess off.  I then burnished the glitter onto the cardstock by running it through my die cut machine- as you can see in the photo below, this worked really well!

I then created several backgrounds with Ken Oliver watercolor powder on Ken Oliver watercolor paper.  I truly love the watercolor paper because it does not warp after being wet.  I made several backgrounds in different ways- some I made by wetting the paper first and then applying watercolor powder, others I made by doing the reverse: applying watercolor powder and then spritzing with water.  Some I made by using shimmer spray instead of water, so that the background was really shimmery.

CBKJan26-3

Next, I gold embossed a sentiment from the Everyday Sentiments Stamp set.  I also die cut a fox from the Bubbles stamp set, copic colored it with YR24 & YR27, and adhered it to the panel with one of the stars.  Finally I adhered the rest of the stars to the panel.

CBKJan26CBKJan26-2

Thank you for stopping by!

Trinity Stamps

Trinity Stamps New Release Blog Hop

83778268_3966546576704924_1302428345517998080_o

Welcome to the Trinity Stamps January 2020 New Product Release Blog Hop!  If you have come from the talented Ashley Hughes YouTube channel you are in the right place!  I hope that you will love all the products in the new release as much as I do.  The release is now available in the shop!!!

The first project is a card using the super adorable Monster Love stamp set and die set, Folded Hug stamp set, Sending Hugs die set and Narrow Card and Bookmark Die with Envelope.  I gold-embossed the Folded Hug sentiment and put a wobbler on the little monster- so he wiggles back and forth!

CBK-3

My second project is a slim-line card again using theMonster Love stamp set & die set, the Slimline Card Series Scalloped Card Panels die set and the Sending Hugs die set.

cbkjan24-2

The final project is with the Make a Monster die set, the Mini Coffee Cup die set, the Monster Love stamp set & die set and the Slimline Card Series Scalloped Card Panels die set.  Sense a theme here?  Yes, I admit, I just absolutely adore the Monster stamps and die sets, which were illustrated by the ultra talented Davina Cantrell.

CBK-2


Did someone say prizes?  Trinity stamp is giving away 3 prizes! Two $15 gift certificates and one $25 gift certificate to the Trinity Stamps shop! To be eligible, hoppers must comment on all stops along the blog hop. Comments are due by 2/7/20 at 11:59 PM PST. The winners will be announced on the Trinity Blog on 2/10.

Next stop is the AMAZING Davina Cantrellwho never ceases to amaze me with her creations

BLOG HOP LINE-UP

Adelina Starce

Amanda Wilcox

Arjita Singh

Brenda Noelke

Dani Bondurant

Ashley Hughes

**Christine Burillo-Kirch**  YOU ARE HERE

NEXT STOP -> Davina Cantrell

Dana Kirby

Elyse Robinson

Emily Mydlowski

Emelie Hessler

Jeannie Lieu

Jenny Hall

Julianne Foyil

Katie Brooks

Jess Francisco

Malgorzata “Goga” Kalbarczyk-Leonczuk

Mirella Rogan

Kelly Butler-Fusco

Nicole Martel

Shanna Slater

Lisa Mensing

Silvia Galloni

Sabrina Leavell

Maria Russell

Trinity Stamps
Thank you for stopping by!


Miss Ink Stamps

Spring Coloring-Shifting Glitter Card

CBKJan19-1CBKJan19-2 copy

Hello! I am so excited to tell you about a brand new product “Dazzle Dust” that can only be found at Miss Ink Stamps.  Dazzle Dust is color-shifting glitter that changes color depending on how light hits it.  I’m using 2 different kinds of Dazzle Dust on my card today and have made a short video showing it shifting color.  The video is located here. The 2 types of Dazzle Dust is Rose Garden and Fairy Dust.

To make the card:

  1. I wanted to make a slim line card using the Springtime Bunnies stamp set and Ei-Ei-O dies.  I die cut a slimline scalloped panel (from Trinity Stamps) and some grass (from Lawn Fawn) to provide background.  I ink blended some custom blended Distress Oxide ink over the top of the panel as shown here, so that it would make the blue cardstock card base.

IMG_5026

2. I die cut and copic colored some bunnies from the Springtime Bunnies stamp set; the bunnies were colored with W3, W00, W0 and R00.

3. To create the glittered sentiment & flowers I first adhered double sided adhesive to Neenah Solar White 110 lb cardstock and then poured either Rose Garden or Fairy Dust glitter over the adhesive, while removing any excess.  I then burnished the glitter into the cardstock by using a bone folder.  To get the color shifting effect, all you need is to burnish a fine dusting of glitter!  I then die cut the sentiment with the Ei-Ei-O dies out of the cardstock with Fairy Dust glitter and the flowers out of cardstock with Rose Garden glitter.  The flowers, stems and flower pot dies are from a set from Lawn Fawn.  Finally, I added some sequins and adhered everything in place.

IMG_5027

I hope that you are intrigued by the Dazzle Dust- it is hard to photograph, but is spectacular and vibrant in person.

Thank you for stopping by!

CBKJan19-2 copy


Trinity Stamps

Tall Dome Bouquet Card

CBKJan13-1

I love the Tall Dome Shaker Die and wanted to show that it can be used year round!  I decided to use some florals (with Valentine’s Day colors) from the Spring Fling Florals stamp & die set.

To make the card:

  1. I die cut a tall dome in blue cardstock and in foam by adhering the 2 dies from the Tall Dome Shaker Die die set as shown below. CBKJan13-2
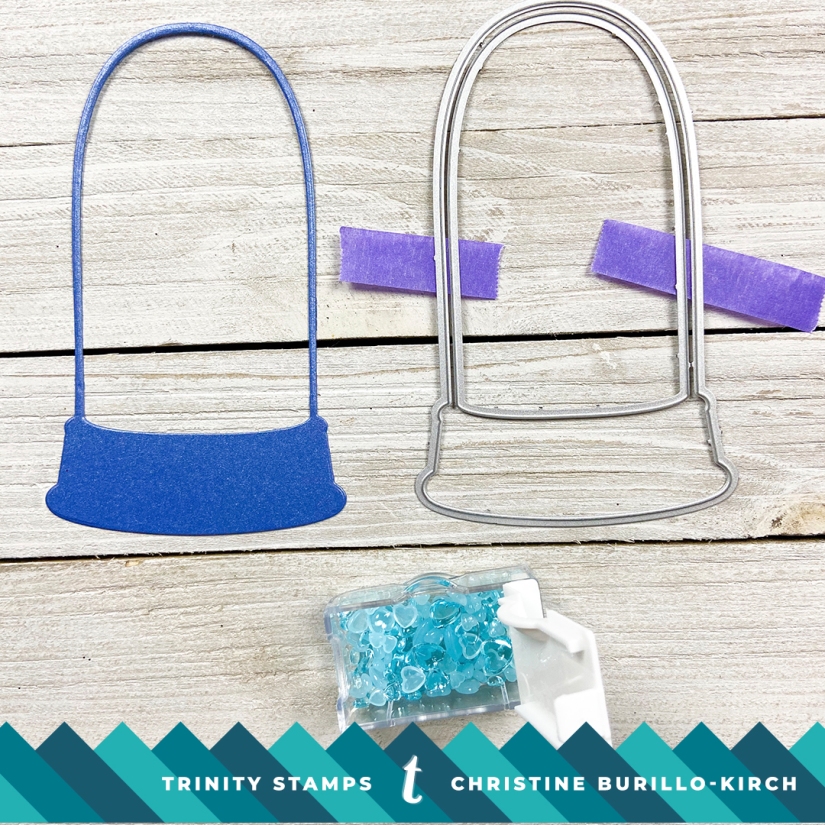
I then only used the outer die to cut a piece out of acetate to make the shaker part of the card. To create the shaker card, you create a sandwich consisting of :dome in blue cardstock, acetate piece, foam piece, shaker parts and finally all this is adhered to a card panel to ensure that no shaker bits can go lost.
  2. The card base is a 6 inch by 6 inch piece of Neenah solar white cardstock scored at 3 inches and folded over.  I cut a card panel out of light blue cardstock using the scalloped die from the Narrow Card and Bookmark Die with Envelope– this fits perfectly on a 3 inch by 6 inch folded notecard.
  3. I die cut the floral images and copic colored with as follows: red flowers- copics R46 and R35, pink flowers- copics R32 & R30, leaves-G43 & G46.  I tend to keep my copic coloring pretty simple!
  4. To finish the card I cut a small piece of wood grained cardstock to serve as a base for the flowers and adhered the flowers and sequins inside the dome prior to sealing the dome up.  I adhered several heart gems around the dome, as well as a tag from the Tall Dome Shaker Die and a sentiment stamped from Sunflower Bouquet Builder stamp set.  A piece of green twine tied the whole card together (pun intended!).

CBKJan13-1


Thank you for stopping by!

Supplies

Dies: Narrow Card and Bookmark Die with Envelope die set, Tall Dome Shaker Die, Spring Fling Floral dies

Stamps: Spring Fling Floral stamp, Sunflower Bouquet Builder stamp set

Embellishments: Berry Blue Jelly Drop Hearts Embellishment mix

Uncategorized

Bubble-blowing Valentine

CBKjan12-1

Hello and welcome!  Today I’m using Miss Ink Stamp’s Bubbles stamp set to create a slimline Valentine.

To make the card:

  1. I die cut a scalloped panel and grass line out of Neenah Solar White cardstock and a green cardstock (sorry, I don’t know the brand) respectively, using Trinity Stamp slim line card dies.  I wanted large bubble letters and found a bubble font from Adobe (you can register for Adobe and do a trial to get it free here) that I had pre-printed onto the Neenah cardstock prior to die cutting.CBKjan12-3
  2. I printed the same sentiment onto masking paper and fussy cut all the letters out.  I offset the sentiment a little bit because I knew that I would have the fox on the right hand side.  I then ink blended with three distress oxide inks (even thought I only show 2 in this picture)- at the end I felt some pink was needed.  I used dried marigold, scattered straw and some spun sugar.CBKjan12-2
  3. I made the bubble font have a bubble quality to them by using copics R00 and BG0000 very sparingly on the edges. The fox was colored with copics YR24 & YR27; the raccoon with copics 100, W3 & N4 (I put W3 over N4 to make it a bit warmer grey); I added YG67 over the grass tips; I used W00 on the mouse,  the snail was C3 & C5. Finally I added some glitter onto Neenah cardstock and die cut several large and small hearts.

Thank you so much for stopping by!

Coffee, Miss Ink Stamps

Pop Up Goat Card


Welcome!  Today I wanted to make a winter/coffee slider pop-up card using several Miss Ink stamp sets “Punny Goat Stamps“, “Springtime Banners“, “Brewtiful” and “Oh Nuts“. It has been a while since I used my favorite critter stamp set “Punny Goat Stamps“; the images always make me smile.

To make the card:

  1. I die cut an A2 stitched rectangle panel from a powder blue cardstock and heavyweight vellum from Bazill.  I decided to use the caffeine molecules as surrogate snowflakes (if you squint really hard, maybe they work!) and stamped the molecules with Versamark ink onto the vellum prior to heat embossing with Gina K white fine embossing powder.  You can use any embossing powder, but I do recommend using the heavyweight vellum as it is the only one that I have found will not warp under the heat of an embossing heat tool.
  2. I wanted to create a scene with a cup of coffee on a table in front of a window with critters.  I taped 2 rectangle dies together and die cut a window frame out of woodgrain cardstock.  For the table I cut a 2 inch  by 4.25 inch piece of Lawn Fawn Speckled cardstock by hand and added a die cut table cloth using a die from the Greetery.  To make the sliding mechanism, the easiest way is to cut a groove, either by fussy cutting or die cutting (several companies have a die cut slider). Below I show that by cutting a piece of heavy weight cardstock (I use Neenah Solar White 110 lb cardstock) into a 3/4 inch by 7 inch piece, one can adhere one or 2 slider elements (seen is the slider element from My Favorite Things) onto that sliding piece that will fit in the groove.  Trapping the sliding elements by adhering the goat die cut on top of the elements now ensures and constitutes the entire sliding mechanism.CBKJan5-2
  3.  I folded over a smaller strip of cardstock (1/2 inch by 3 inches) onto itself and adhered it to the card base (near the top of the card base so that there was a track for the pull mechanism to rest in.  I also adhered some double-sided foam to the back of the card panel as shown, so that there was ample room for the slider to be able to move.CBKJan5-5
  4. I stamped all the images in Momento Black Tuxedo ink onto Neenah Solar White Cardstock (85lb) and die cut them with my Brother CutnScan 2. I colored all the images with the copics shown here: coffee cup (E31, B63, B60), goat (E37, W3, W00, R00) squirrel with (E37, R00 & E31) and added white gel pen highlights.CBKJan5-3
  5. Finally I just adhered everything together, added a little pull tab (Lawn Fawn has several), the banner stamped with a sentiment, some sequins and a few scarfs & a hat stamped from Sunny Studio stamps.

CBKJan5-1

Thank you for stopping by!!!