Miss Ink Stamps

Nuts about you card!

CBK

Today I have an interactive card using the adorable “Oh Nuts” stamp set and my favorite background stamp set “Woodgrain Background“.  This interactive card allows the recipient to put acorns in the squirrels home in the tree; a hidden pull tab allows the acorns come out the bottom.

Briefly:

  1.  I stamped the Woodgrain Background several times with Memento in Rich Cocoa on Neenah Solar White cardstock.  I then blended Distress Oxide Ink in ground espresso over the entire panel.  I fussy cut out the spindle shaped area and adhered it to another cardstock panel behind the tree.  I also did ink blending on this same cardstock piece that had the adhered piece with distress oxide ink in rusty hinge and wild honey to create a fall early sun rising.
  2. I adhered foam to the back of the tree trunk and created a slot for the acorns.  Another foam piece (1/2 inch by 3 inches long) blocked the lower part of the slot; when you slide this piece back and forth it releases any accumulated acorns.
  3. I stamped all the images for the wreath and the squirrel & acorns with Memento black ink on Neenah solar white cardstock.  All the images were cut with a Brother Scan n’ Cut 2 and copic colored.
  4. Final touches included die cutting some grass, adding some sequins and heat embossed a sentiment with white embossing powder.

Thank you for stopping by!

CBK2

Trinity Stamps

National Coffee Day with Frappy Camper!

Happy National Coffee Day!!!!!

71186260_398944817671336_6724912887015407616_o

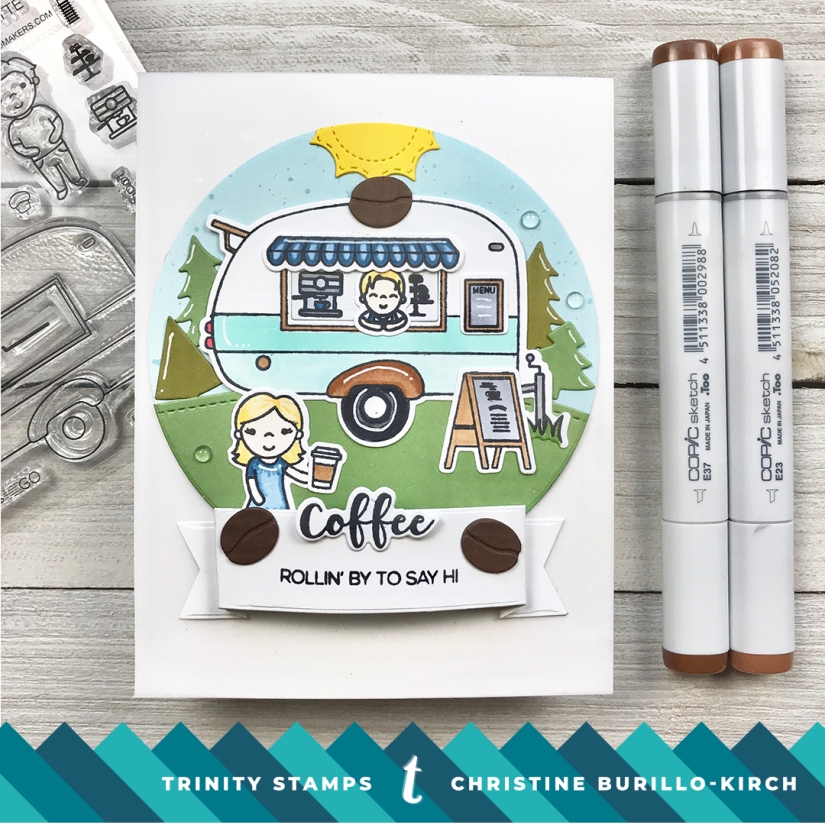
Isn’t this set just gorgeous?  I was so excited to be a very small part of this amazing collaboration between Trinity Stamps & the Coffee Loving Cardmakers; I just love how it turned out.  If you are coming from the Trinity Stamps blog, you are in the right place!

CBK-coffee

I *love* (it’s an understatement) the new Perking Spot stamp and die set. I used some ink splattered vellum as a backdrop for a circular scene. I die cut elements from the Mini Coffee Cup Sleeve and Decor die, the Castle Scene Builder die and the Cloudy Day A2 Scene Builder die sets and copic colored all the images.

There is a $20 gift card up for grabs and all the details are on the Trinity Stamps blog.  So grab a cuppa and I hope that you are inspired by all the amazing projects the DT from the CLC & Trinity Stamps have made.  Happy National Coffee Day!


Trinity Stamps

Pumpkin pocket card with goodies!

cbkSat

Hi there!  Today I’m up on the Trinity Stamps YouTube channel with a video about the Harvest Candy and Flower Bucket dies from Trinity Stamps new release!  The video is located here.  I’ve used the narrow card & envelope die to create a fun pumpkin pocket that houses a surprise.

Briefly,

  1. I die cut all the parts of the jack o lantern from various cardstocks, and die cut the narrow card panel as well. I also die cut the word “hello” from glitter cardstock the shadow die from regular cardstock using the Hello Senti Mini die set.
  2. To create a pocket, first I taped the black eyes & mouth to the jack o lantern.  I then glued 2 of the pumpkin shaped pieces together- one that had the face die cut and one piece that was whole to creat a pocket.  I then glued the remaining pieces to jack o lantern to create a look that had more depth.
  3. I then adhered everything to the narrow card die panel and tucked in a package of embellishments from Trinity Stamps.

Thank you so much for stopping by!  I hope that you will give the new dies a try!

Links to supplies used- affiliate links used at no extra cost to you- thank you for your support!


Trinity Stamps

Trinity Stamps Fall 2019 Release Blog Hop

70578184_390914008474417_101309594088767488_o

If you arrived from the uber-talented Brenda Noelke, you are in the right spot!  Trinity Stamps Fall 2019 release is here and live in the shop!  We have so much inspiration for you and of course a Giveaway!

Giveaway Details: One reader will be randomly selected to receive a $25 Trinity Gift Card. Leave a comment on all the blog hop stops for a chance to win! Winners will be announced on Friday, September 20th. 

OK, and now for the project I made using the new release!  I just love this new release- so many amazing stamps & dies!  For this project, I used the new Blending Buddy and the Harvest Candy and Flower Bucket die set.

CBK-release

I blended the background with 3 distress oxide inks using the Blending Buddy.  I die cut all the images from the Harvest Bucket die set with different cardstocks including glitter cardstock for the candy.  I set up a chibitronics circuit to light up the pumpkin.  I plan to do a video on how to make a similar pumpkin project soon.

By the way, a pre-release party (games & prizes) has been underway at Trinity Stamps FB group, please head over there and join us for all the fun!  The next stop on the Blog Hop is the Courtney Kreeber, a master of all things copic and awesome designer!  Thank you for stopping by!

The Trinity Stamps Autumn Release Blog Hop:

Trinity Stamps

Brenda Noelke

Christine Burillo-Kirch <-You are here

Next stop ->Courtney Kreeber

Davina Cantrell

Emelie Hessler

Emily Mydlowski

Jeannie Lieu

Katie Brooks

Lisa Cisneros

Jenn Bena

Shanna Slater

Seeka


Trinity Stamps

Fall Floral Card

CABK#1

I cannot wait for fall and I think this card expresses that!  There is a very short video showing some of the process here.  I used the Candy Jar stamp set, the Candy Jar die set, Narrow Card/Envelope & Bookmark die set, the Winter Botanical stamp set, the Winter Botanical die set and the hello Senti-mini die set, as well as the blue lagoon confetti.  That is a lot of products for one card, but I love to mix and match Trinity’s amazing products!

Briefly,

  1. I die cut all the panels & envelope parts from the Narrow Card/Envelope & Bookmark die set, and adhered the panel to a 3 inch by 6 inch card base.  I show how to put the envelope together in the video as well- you have to die cut 2 side panels and the main envelope panel with the 2 flaps.
  2. I cut a smaller panel out of white Neenah cardstock, stamped part of the jar (masking the top part off) with Memento tuxedo black ink, and then prepared a mask of the jar itself, which I placed over the image on the panel.  I then ink blended distress oxide inks- scattered straw first, then spiced marmalade and finally festive berries at the corners to create a fall backdrop for the vase with the flowers.
  3. I stamped some of the Winter Botanical stamp set images with Versamark ink and then heat embossed with gold embossing powder onto Smooth Bristol watercolor paper.  I stamped the same images in peeled paint distress oxide ink & rusty hinge distress oxide ink onto another panel of Smooth Bristol watercolor paper.
  4. I colored all the images either with peeled paint, festive berries, or rusty hinge distress oxide ink and then adhered them in the vase.  Finally I die cut the Candy Jar with acetate and with Lawn Fawn speckled blue paper to create a vase with a blue hue, die cut the word “hello” out of gold metallic paper & adhered the blue lagoon confetti.

Thank you so much for stopping by!  Have a great day!

CABK#2

Supplies: Affiliate links used at no extra cost to you. Thank you for your support!

Miss Ink Stamps

Mondo Flower Bouquet

CBK2

Hi everyone! I can hardly believe that it is Labor Day Weekend!  Hope that you are enjoying the extended weekend with your family!

Today I’m up on the Miss Ink Stamps blog with a card using a little bit of masking.  I had envisioned one of the adorable critters from the Miss Ink Stamp lines holding a huge bouquet of flowers, but I didn’t know which one or if there would be multiple critters involved.  After looking at the size card I was making & the huge size of the Gardenia Stamp set, I decided that one little hedgehog from the Bubbles stamp set would be it!

To make the card:

  1. First I stamped the large gardenia stem in tuxedo black Momento ink on an A2 sized panel of Neenah solar white cardstock.  I then stamped the same image onto masking paper so that I could mask off the bottom stem before stamping the hedgehog in the same black ink on top of the mask with the stem.  I did wipe off the ink on bubble wand prior to stamping the hedgehog.  I then stamped and fussy cut out a few extra flower images.
  2. I googled gardenias prior to coloring, as I truly love to have the real thing in front of me when I color.  I copic colored the flowers with Y11 in the center and Y0000, YG61 on top of the petals and C00 on the underside of the petals.  The leaves were copic colored with YG61 & YG67 on top and Y28 on the underside. The hedgehog was colored with Y28, E37, E50 & E51 and some white highlights from a white Gelly Roll pen.
  3. I always have to have sparkle in some manner, so I added some Cosmic Shimmer Sparkle Texture Paste in
    to the buds & centers of each flower.  I finished off the card with a frame in antique gold cardstock and patterned cardstock with a pretty script and a couple of yellow sequins.

Here is a close up of the shimmer:

CBK3

I hope that this card inspires you to do some masking!  It is so much fun once you get the hang of it!  Happy Labor Day Weekend!

There is a huge Labor Day Sale going on at Ellen Hutson!

Here are the supplies I used in case you would like to purchase them at the sale! Affiliate links used at no extra cost to you!